

Coconut Delights Easter Eggs
Just look! These coconut treats will delight you in three different ways!
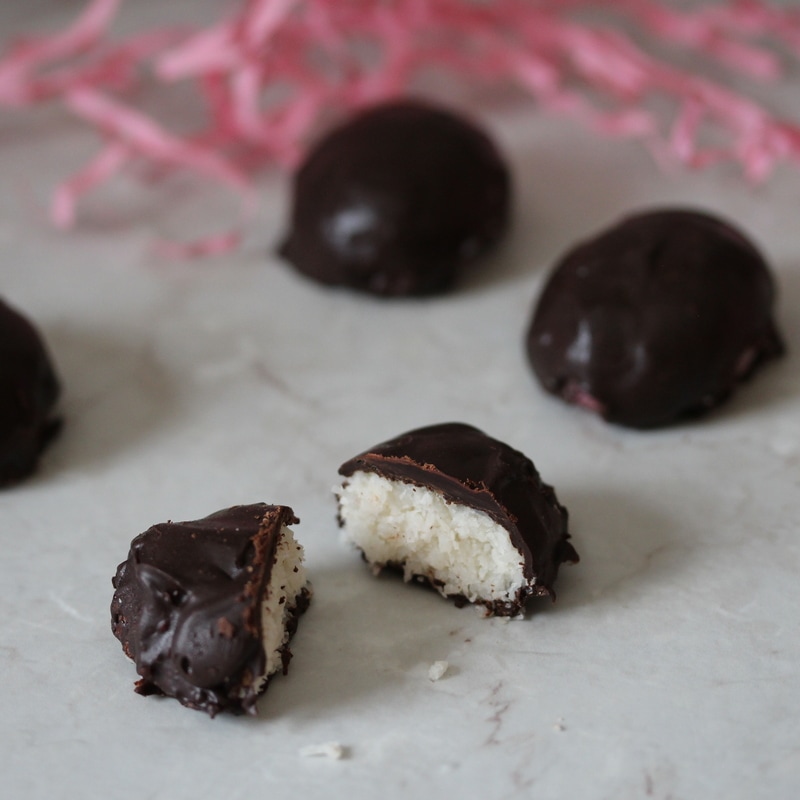
Yummy coconut filling enrobed in dark chocolate!
If you love coconut treats then you'll surely love these Coconut Delights! Mold them in any shape you wish and they'll be positively delish!
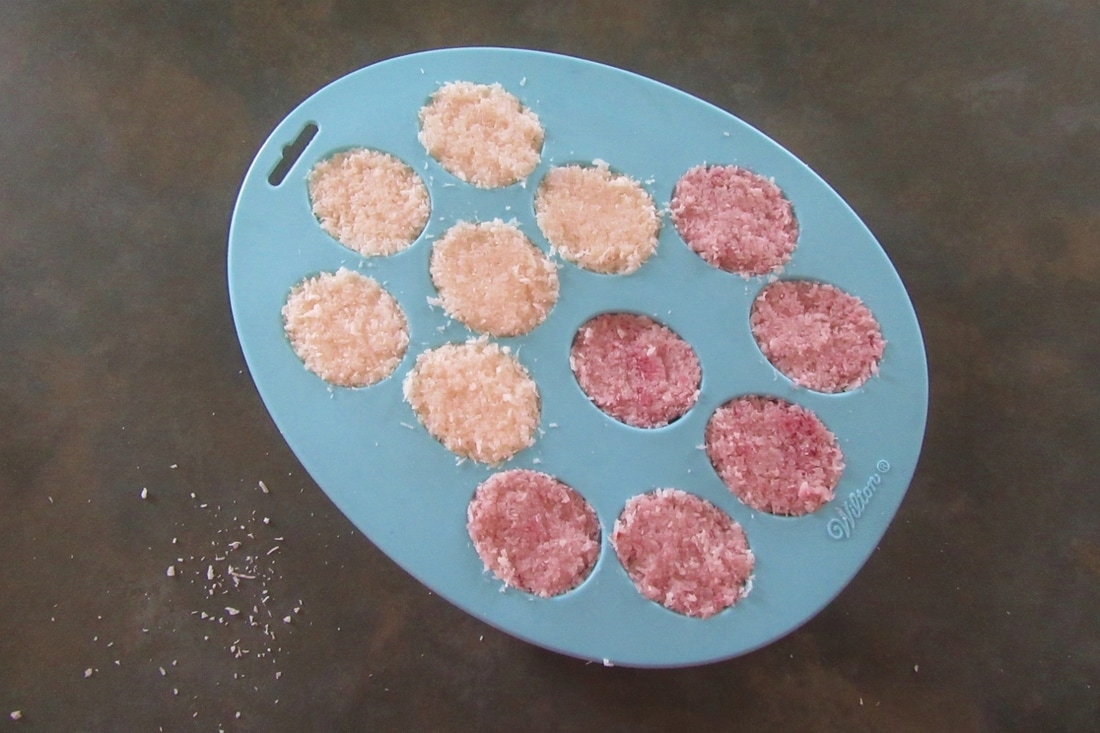
Fill each cavity. Then pat down the filling to make room for the chocolate base.
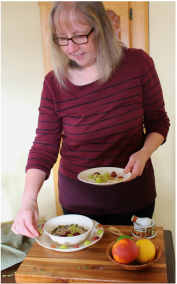
Here I used an inexpensive silicone mold to shape the filling into an egg shape for a springtime treat. I divided the filling into two bowls and flavoured the filling in one bowl with raspberry purée. After the coconut filling had cooled I added a layer of chocolate on the bottom and let it cool in the fridge before unmolding.
Silicone baking cups are another great option for molding little these little coconut treats. Shaping them by hand is also an option. Just take a heaping tablespoon of the filling and roll it into a ball. Then flatten it into a disc if you wish. Or to obtain an egg shape, press down on the ball to flatten the bottom and shape the top with your hands. 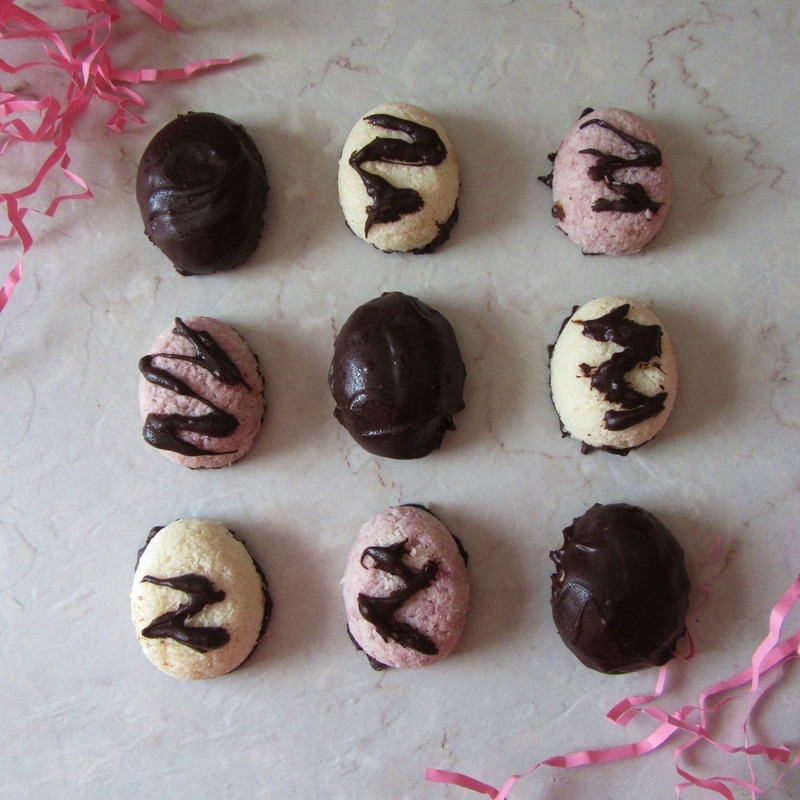
Coconut Delights. Which one will you taste first?
Shown above are three delicious variations of these Coconut Delights. All of the treats were either dipped by hand into melted chocolate, and/or had melted chocolate drizzled on them. Each one was then placed on a baking sheet covered with parchment/waxed paper and allowed to cool in the refrigerator before serving.
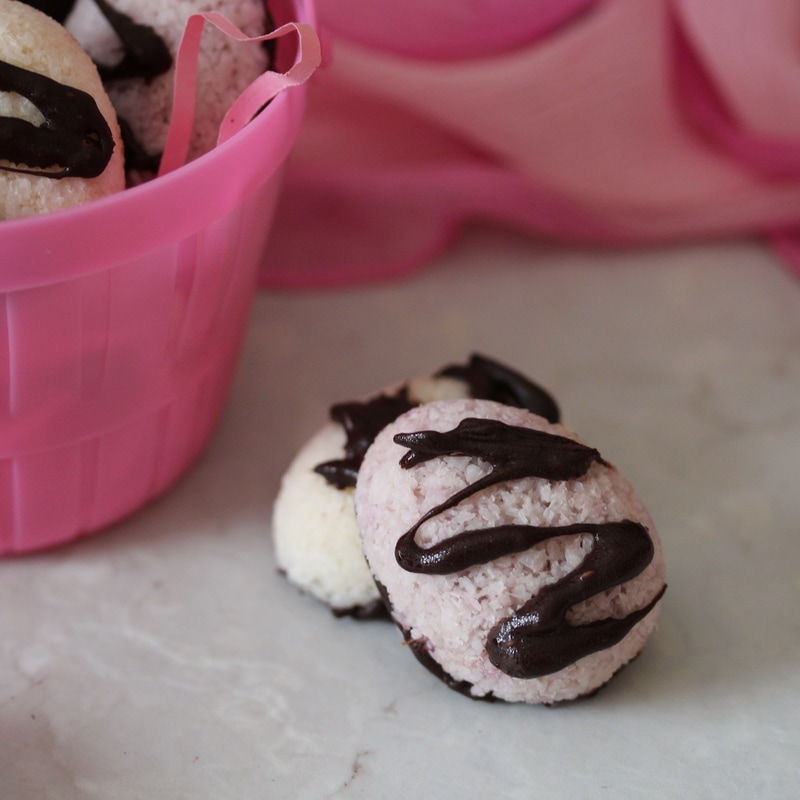
So many possibilities! Try a pretty drizzle of chocolate! Or a flavourful raspberry filling!

COCONUT DELIGHTS
No-bake (raw) creamy coconut yumminess molded in any shape you desire! Easy to make and such a delight to eat! AUTHOR: Beverley Noseworthy MEAL: Dessert, snack DIETARY INFO: FODMAP friendly, gluten free, peanut free, vegan MAKES: 12 treats INGREDIENTS FOR THE TOP CHOCOLATE COATING (Optional)
FOR THE COCONUT FILLING
FOR THE BOTTOM CHOCOLATE COATING AND GARNISHING
SUGGESTED GARNISHES (Optional)
METHOD TO MAKE THE TOP CHOCOLATE COATING (Optional) 1. Place 1 ounce of chocolate in a microwaveable bowl. Microwave on high for 30 seconds, and then in 10 second intervals if necessary, until chocolate is almost, but not completely melted. Then stir the chocolate until it has completely melted. (Or use another recommended method to melt the chocolate.) 2. Place a teaspoon or so of melted chocolate in each cavity of a silicone mold* and tilt it so that the melted chocolate coats each cavity completely. You could also use a small spoon or silicone pastry brush to coat each cavity. Place the mold in the refrigerator to cool. TO MAKE THE COCONUT FILLING 1. In a medium bowl, add the desiccated coconut and coconut cream. Stir to combine. 2. Add the coconut milk, maple syrup, vanilla extract and salt to the coconut mixture and stir well to combine. (For raspberry flavoured filling see note below.**) 3. Remove mold from the fridge and spoon the coconut filling into each cavity. Pat down the filling to almost fill each cavity, leaving space for the layer of chocolate which you will add next. TO MAKE THE BOTTOM CHOCOLATE COATING AND GARNISHING 1. Place 1/2 ounce of chocolate in a microwaveable bowl. Microwave on high for 30 seconds, and then in 10 second intervals if necessary, until chocolate is almost, but NOT completely melted. Stir until chocolate is completely melted. 2. Spoon melted chocolate on top of the filling in each cavity of the silicone mold. Use the edge of a knife or scraper to scrape off any excess. Place in the refrigerator for a few minutes to harden. 3. Prepare the chocolate for garnishing if you wish to add any. Spoon melted chocolate into a paper cone or small plastic bag and cut off a small tip. 4. Remove chocolate treats from the fridge and gently unmold each one unto a cookie sheet topped with a piece of parchment or waxed paper. 5. Drizzle on the chocolate garnish, if using. Serve immediately or place in a covered container in the fridge for up to 3 days. COOKING TIPS
PER SERVING (One chocolate-coated coconut treat) Calories: 122 Carbohydrate: 8 g Fibre: 1 g Sugars: 6 g Fat: 6 g Protein: 1 g Want to print and share this recipe? Simply click on the buttons below!
Have you tried this recipe? I'd love to hear about it!
0 Comments
Leave a Reply. |
My kitchen is rockin' with recipes old and new!
Click to connect!
Hi there!
Thanks for joining me in my kitchen! Check out my blog posts to find out about the tasty delights I've been whipping up lately! Warmly, 
 Categories
All
You may also like to...
See what's in the pantry.

Search the recipe box.
Visit my studio page.
Archives
April 2017
|
 RSS Feed